Archive for March, 2010

Clematis Flower Photo Tutorial

Sorry, I had this post drafted and ready to post for like a week, but life recently has been super busyand FUSION-ful. Gosh, despite all of the things that I went through during winter quarter, Fusion has been one of the most amazing experiences ever, and I am so glad that I joined and stuck with it. I could go on for a lot longer, but since this blog is supposed to be focused on arts and crafts, I’ll keep that to my other blog. 🙂

Anyways, as requested, here is a photo tutorial on how to fold Makoto Yamaguchi’s Clematis Flower! I hope that the steps are clear and easy enough to follow, but please do let me know if you do have questions.
clematis flower step

UNIT

1. Start with color side up, and fold in half.
clematis flower step

2. Fold edge on top layer to folded edge
clematis flower step

3. Flip over, fold edge on to folded side, and unfold.
clematis flower step

4. Fold top corners down to center.
clematis flower step

5. Flip over, fold bottom right corner to center, and unfold.
clematis flower step

6. Fold left corner, following crease made in 5, and unfold then reverse fold.
clematis flower step

7. Fold point over center line, unfold.
clematis flower step

ASSEMBLY (7 units)

1. Connect units by inserting the bottom corner.
clematis flower step

2. Fold point to lock.
clematis flower step

3. Continue connecting with this method, until all pieces added.
clematis flower step

4. Connect the last pieces, completing the flower!

Comments (18)

Morning Glory + Bracelet

morning glory (2)
30 units. Tant paper (Mountain Valley Paper Company). model by Tomoko Fuse in Origami Tanteidan #71.

I really liked how the orange Morning Glory model came out before, so I thought that I would try it with the lighter shades of the Tant Paper. I forgot how time consuming making all those pre-crease and measurement folds was. Time to complete the model: 1 movie, 3 drama episodes. Still, I really do like how the model turns out!

Last time, I had used glue to make sure that the model held steady, but I tried to just rely on the paper this time. The texture of the paper adds friction, so I thought that it would be okay, but I ended up using tape. Glue definitely works better, since the point with last piece that I put in tends to come open. I think I might glue it later.

In this model, you have to cut off a strip to size the square, but I didn’t want to just throw away the scraps. My Starburst bracelet was wearing out and the paper strips looked like the perfect dimensions, so I decided to make them into a bracelet!

morning glory bracelet

I tried to go for a more gradient effect with the color, but I think it seems to be more blocks of color. I don’t really like wearing pink pastels, so I don’t know what to do with this. Well, I suppose that if I did this model again in a different color, I’d be able to do another one.Otherwise, any other ideas for creative uses of the paper strips? oh, maybe quilling!?

P.S. Look forward to the post with photo instructions for Makoto Yamaguchi’s Clematis Flower coming up later this week!

Leave a Comment

Sandshrew Hoodie

I’m sick and stressing over finals, and life in general is just going terribly, so I thought I’d take a break to do this post. These Gijinka Pokemon pictures have been going around for a while, so I’m pretty sure that a lot of people are familiar with this Sandshrew:
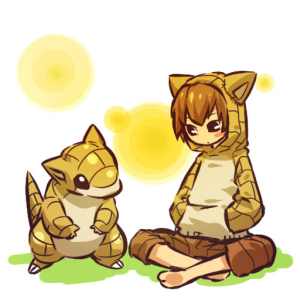
sandshrew gijinka

I am seriously in love with this hoodie, and so over spring break I really want to make one! Either that, or a Girafarig hoodie. Or maybe, I could make both!

BTW, you can find these images and more from the original artist’s site! There are so many amazing pictures, and so many costume ideas that I’d love to try.

So anyways, with that purpose established, this will be something like a project planning resource post! I lost my notes that I made for this last month, so hopefully this will help me to keep organized and motivated.  And who knows, maybe someone else trying to make one will find this useful as well! Please do let me know if you have any other links/advice that might be helpful!

OTHER POKEMON HOODIE PROJECTS

Keiosu@cosplay.com: {X} {X}: “I made my jacket I used canvas for the majority of it and fleece for the stomach area and hood lining. Although it frayed a bit, the canvas was easy to work with and it’s surprisingly comfy. I painted the canvas area with brown fabric paint and it worked fine.”

invader-gir@deviantart.com/Studio Kitsu:  uses fleece material, has plush tail (see comments).

stillvisions@cosplay.com: -looks quilted, lots of work, careful for fabric puckering.

shoriameshiko@deviantart.com:-raglan sleeves. “The tail is held up by very sturdy interfacing, so it may not always be perky all the time, but it is more natural and comfortable to wear than a wire inside the garment.  face is appliqued carefully with a freehand satin stitch with embroidery thread. The emblem is made from flannel for extra softness that is sorely lacking from other manufactured products with felt features.”

kuchikixrukia@deviantart.com

MISC. TIPS AND ADVICE

DESIGN: quilting OR painting the lines – cut out all the pattern pieces for the hoodie, so you can see which way the rectangles need to go, then tape off lines with masking tape (measuring it all out and marking with washable pencil to get them perfectly straight), and paint the lines with textile paints, then once dry, sew the cut pieces together normally like the pattern says.

MATERIAL:  sweatshirt or cotton jersey fabric would work well, just nothing napped, like fuzzy fleece, it doesn’t take paint well. – fleece/flannel. canvas?
amounts: 2+ yards of main fabric, .5 yard lining (for hood), 20″ or longer separating zipper, .5 yard rib knit fabric

HAND COVER (?): two semicircle pieces that fit over my hands of course. I sewed those together and turned it inside out. Then I could pin it to the end of the sleeve, right sides together. I only sewed the top half, where the top of my hand would be when in the mitt. Iron the seam where you sewed and make sure to iron down the seam allowances for the rest of the sleeve and the mitt. If you hem those seam allowances and get them sewn down you’ll have finished edges around the opening for your hand to pop out

TAIL (?): For the tail, I just did a simple flat tail with very heavy interfacing to keep it standing up. For the flame, I took a circle of yellow fleece and sewed a strip of orange around it, and then a strip of red around that, then cut it into a flame shape and sewed 2 of those together — I stuffed it a bit too.

LINING (?): warmer, but too complicated? Will line the hood with the contrasting lighter color fabric.

RAGLAN SLEEVES: drafting pattern instructions, pattern maker examples

GENERAL HOODIE TUTORIALS

gnacissej@craftster.org – trace pattern from existing hoodie

Mezzi@craftster.org with reconstructed t-shirt

Kaiser Scissorhands@craftser.org general, note use of bias strips

http://community.livejournal.com/craftgrrl/10909654.html – random tips in comments

I’d go with Darkrai personally, only because I’ve seen several gijinka Sandshrews already. If you still want to do the Shrew though, I’d recommend painting the lines on instead of quilting, unless you don’t mind sewing tons of little squares together.What I would do is cut out all the pattern pieces for the hoodie, so you can see which way the rectangles need to go, then tape off lines with masking tape (measuring it all out and marking with washable pencil to get them perfectly straight), and paint the lines with textile paints, then once dry, sew the cut pieces together normally like the pattern says. As for fabrics, sweatshirt or cotton jersey fabric would work well, just nothing napped, like fuzzy fleece, it doesn’t take paint well.

Comments (11)

Gum Wrapper Icosahedron Stars

More of the 30 unit icosahedron stars from Tomoko Fuse’s Unit Origami, made out of the Wrigley 5 gum wrappers in various colors! Sorry about how the photos came out this time; still using my cellphone.  I meant to give these away, but I forgot… maybe I’ll give it extremely belated;;

foil icosahedron 1

I love this model! Definitely my favorite color combination, since it kind of reminds me of fireworks and flowers. I originally had planned to include this with a set, matching like the color palette with the other items, but oh, even though that didn’t come through, even on its own, I’m really happy with how it came out.

Too bad that I dislike the flavors for these color wrappers. Red is “Flare” (cinnamon), yellow is “Lush” (tropical), and the silver is regular Wrigleys Winterfresh.  Cinnamon is alright, but kind of spicy. Tropical is absolutely disgusting. Regular Winterfresh has a strong sugar taste. So sadly, I’m unlikely to have many more with this colorway.

foil icosahedron 2

I tried a solid variation here, using the “Solstice” (warm and cool winter). I have no idea what that flavor is supposed to be, but I really like it!  I have some ideas for more complex shape models that I might do with gum wrappers, so they’d probably be in this color.
foil icosahedron 3

Well, this model uses the colors from my top three flavors of gum, with dark blue from “Cobalt” (peppermint), green from “Rain” (spearmint), and the light blue again from  “Solstice”.  I actually don’t like how the color combination turned out as much, since it seems a little dark, and the colors aren’t as distinguishable from each other.  I have a lot of these wrappers, so I’ll have to figure out something nicer to do with them. Any suggestions?

Comments (1)

Starburst Bracelet

Only 8 wrappers to the next one! Anybody else interested?

starburst bracelet
36 Starburst wrappers.

I mostly folded pieces during dance practice on Thursday during downtime, and put it together today. This used to be 40 pieces, but wanted to shorten it a bit to make it fit better. Overall, a simple project: easy to learn but a lot of fun to make.
The style is definitely more quirky than what I usually go for, but it’s playful and colorful, and it makes me happy. I’m going to wear it anyways! it

Comments (1)

Sakuradama and Clematis Flower

I bought a bunch of origami paper packs from Aunty Vicky (Mountain Valley Paper Company) when we went to SF over winter break, so here are the first models from that! The Tant paper has a nice weight, and light texture, making it nice to fold with. 12 color variations, so it’s a change from the single color kusudama that I usually do.
I can’t find my camera charger, so it’ll be cell phone pictures for a while, sorry.

cherry blossom ball
30 unit. sakuradama by Tomoko Fuse. Tant paper.

haha, I really do like this one. Again, instructions from this are from Tomoko Fuse in Origami Tanteidan #72. This one was done using the light, medium and dark shades in the 3 color pattern, but I wonder if it would look nicer if I changed the arrangement to make transitions between colors less obvious? Having the dark and light pieces juxtaposed feels a bit out of place, since the flower petals come out looking disjointed? Maybe I’ll try this next with the light half of the
clematis flower
7 unit, clematis flower by Makoto Yamaguchi. Tant paper

Instructions came with the pack of paper. Simple and easy to make. I think it would look nice with a lot of these done, and connected in a hanging vine as some sort of wall decoration? Something like the bottle flowers from Anthropologie?

EDIT: Now with photo tutorial here!

Comments (7)

More Folding with Gum Wrappers

ah, sorry about the delay again. Life this quarter has been quite hectic. I’ve been mostly writing on my other blog, so I felt like something here should get an update too! These models are all from last year, so they’re not really “new”, but I thought that I would post about them anyways. Four models this time, all from Tomoko Fuse’s Unit Polyhedron Origami.

IMGP5065
90 unit, double sided concave hexagonal ring unit (?). gum wrappers.
This one was hard to assemble, and wasn’t especially sturdy. If not handled gently, it would come apart, and after I transported it from back home from school, I had to reassemble, using tape on the inside to keep it in shape. Would definitely try making something like this again, but I’ll have to collect a lot more wrappers, haha.

IMGP5070
30 unit, double sided convex hexagonal ring unit (?). gum wrappers.
Nothing especially difficult about this piece, but it was hard to figure out exactly how to string it up.

IMGP5066
30 unit, diagonally folded triangle unit. gum wrappers.
I think that this model comes together really well with gum wrappers! Putting the last piece in place is a challenge, since it’s difficult to do without causing folds and other dents in the other peaks.

IMGP5080
30 unit icosahedron, candy wrapper.
This one was made from the wrappers from the gummy candies! Since the pieces were cut small, it was very difficult to assemble, compounded by the fact that the foil wrappers tended to curl and did not keep shape well. I ended up using blue tape on the inside to keep it together. It came out cute, but I think that if I were to use the wrappers again, I’d use larger pieces.

Comments (2)